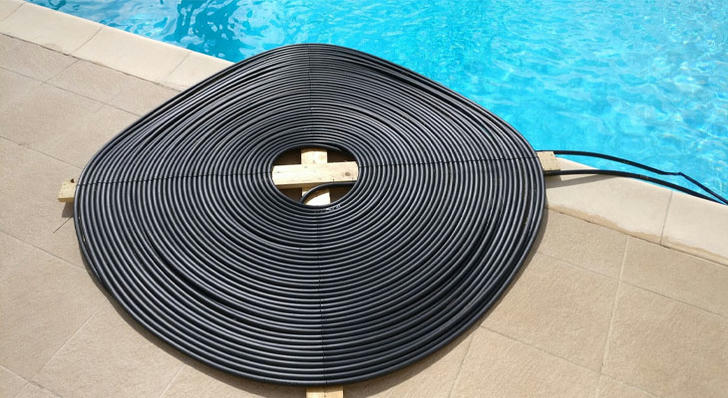
How to build a diy solar pool heater for under $100
As the fall and winter months approach, many people start to put away their pools, but if you're looking to extend your swimming season, building a DIY solar pool heater is an ideal option. For less than $100, you can harness the sun's energy to heat your pool water, allowing family and friends to enjoy warm waters even on cold days. This simple and practical project will not only save you money on energy bills, but will also allow you to enjoy your pool during the winter months. Let's explore how to make this happen!

I.Understanding How Solar Pool Heating Works
Solar pool heaters harness the sun's energy to heat your pool water. Through specific materials and a simple design, this heater can effectively raise the water temperature, making your pool usable for longer periods of time. Not only is it environmentally friendly, it can also lower your electricity bills.
II.Materials List
To build a DIY solar pool heater, you will need the following materials:
1.Black plastic pipe (about 100 feet)
2.Water pump (choose a low-power one)
3.Pool hose (connect the pool to the heater)
4.PVC joints and fittings
5.A gutter or wooden board (serves as a base for the heater)
6.Insulation (such as foam board to reduce heat loss)
7.Tie ties or clamps (to secure the pipes)
III.Design and assembly
1.Determine the location: Choose a sunny spot, preferably near the pool area to reduce the distance the water has to travel.
2.Make a base: Use a gutter or wooden board to make a stand, making sure it is tilted to receive the most sunlight.
3.Lay the black plastic pipe: Arrange the black plastic pipes in a spiral or parallel pattern to ensure that as much water as possible passes through these pipes. The black surface absorbs sunlight and heats the water quickly.
4.Connect the pipes: Connect the heater to the pool using the pool hose. Make sure all joints are well sealed to avoid leaks.
5.Install the pump: Place the pump on one side of the pool and connect it to the inlet of the heater to ensure that water can flow into the heater.
6.Insulation: Add insulation around the pipes to reduce heat loss during transportation.
IV.Testing and debugging
After assembly, you can start the pump and observe whether the water flows smoothly. Monitor the water temperature changes to ensure that the system is operating properly. Generally speaking, you should see a significant increase in water temperature on sunny days.
V.Maintenance and optimization
1.Regular cleaning: Regularly check and clean the pipes to ensure that there are no debris blocking the water flow.
2.Check the connections: Regularly check all connections to ensure that there are no leaks.
3.Adjust the angle: Adjust the angle of the heater to maximize sunlight according to seasonal changes.
VI.Economic Benefits
With this DIY solar pool heater, you can not only enjoy a warm pool, but also significantly reduce your energy bills. Although the initial investment is less than $100, you will be pleasantly surprised by the long-term savings on electricity and water bills.
VI.Conclusion
Building a DIY solar pool heater is an economical and environmentally friendly choice. With simple steps and easily accessible materials, you can transform your pool into a warm and comfortable haven. With the power of the sun, you will enjoy endless pool fun without having to worry about high heating bills. Get started now and make your summer pool experience the ultimate enjoyment!
